Configure Modern widget
Starting from September 2025, you’ll have the option to use our new, modern booking widgets. Over time, more and more features will be added. These include both the existing functionalities of the current booking widgets as well as new or improved ones.
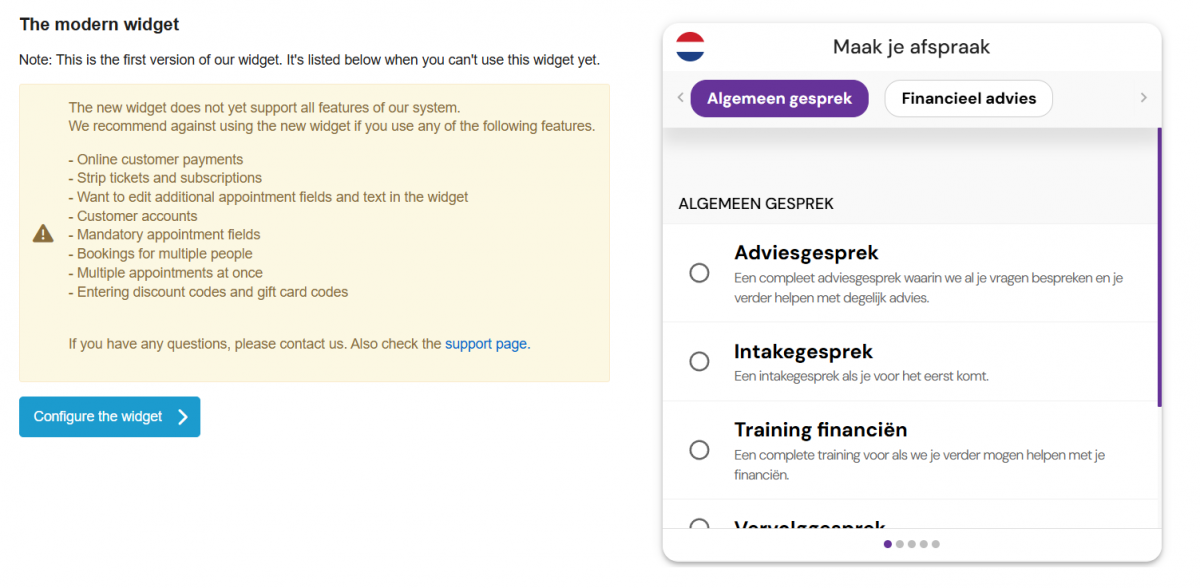
Note: The first version of the modern widget has limited functionality. For example, the following features are currently not available in these widgets:
- Online consumer payments
- Mandatory or optional client accounts
- Booking multiple appointments at once
- Bookings for multiple people
- Entering gift cards and coupon codes
These and more functionalities will be added in future versions.
If you are in doubt whether you can already use the modern widget for your company, please do not hesitate to contact us through +31-302412042 or info@onlineafspraken.nl.
To configure the modern widget, go to Settings > Modern widget:
On the right side, you will find a preview of the modern widget. To further configure this, press the blue button "Configure the widget". You will then enter the next configuration screen.
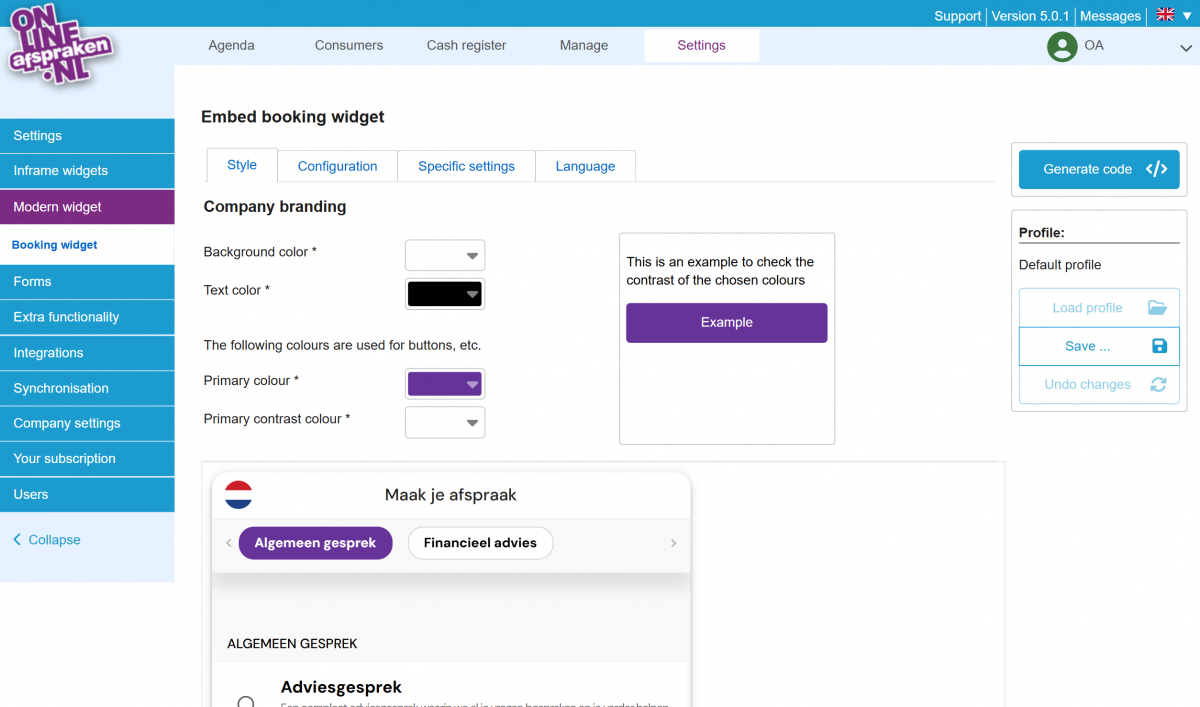
On the first tab, Style, you can adjust the colors of the widget. For example, you can choose a background color for the entire widget so it matches your website or branding. You can also select a text color that fits your site. The primary color is the color most prominently used in the widget — the preview shows how it will appear. You can also set a contrast color and instantly check whether the contrast works well in the box next to the color settings. Just below that, you’ll find a live preview that updates automatically when you make changes, allowing you to test everything right away.
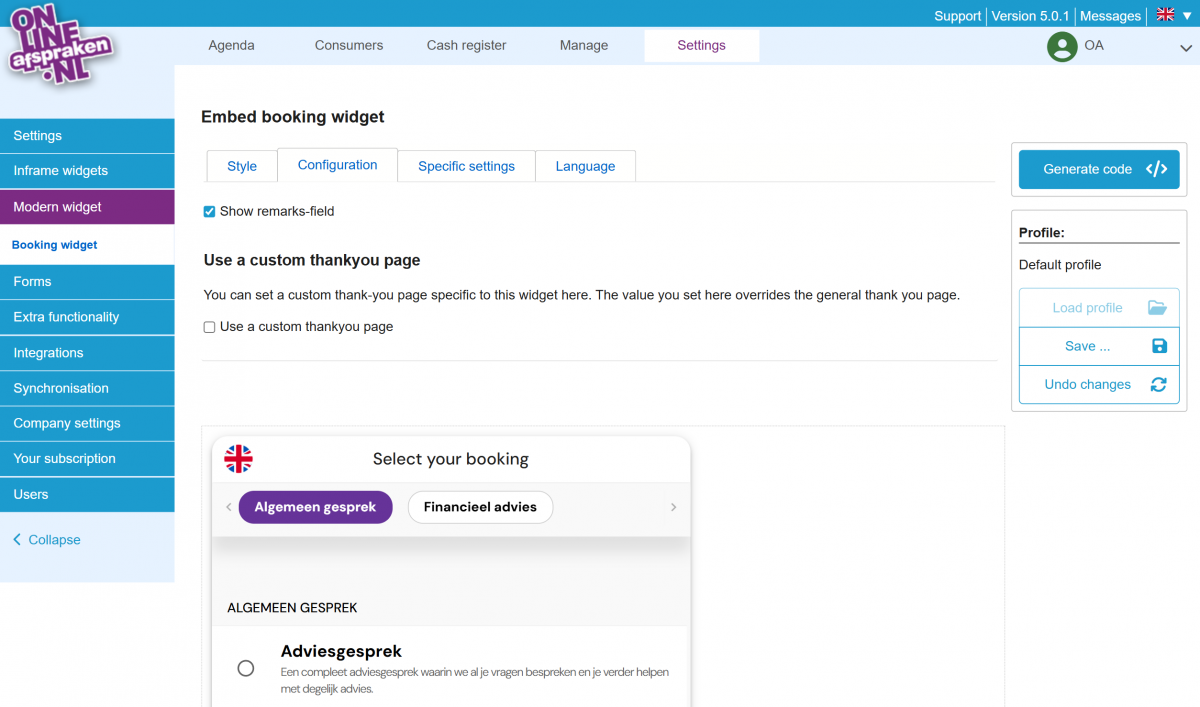
On the next tab, Configuration, you can decide whether to display a comment field and whether to accept both private and business customers, or only one of these groups. You can also set up a custom thank-you page — this is the page users are redirected to after completing the booking process.
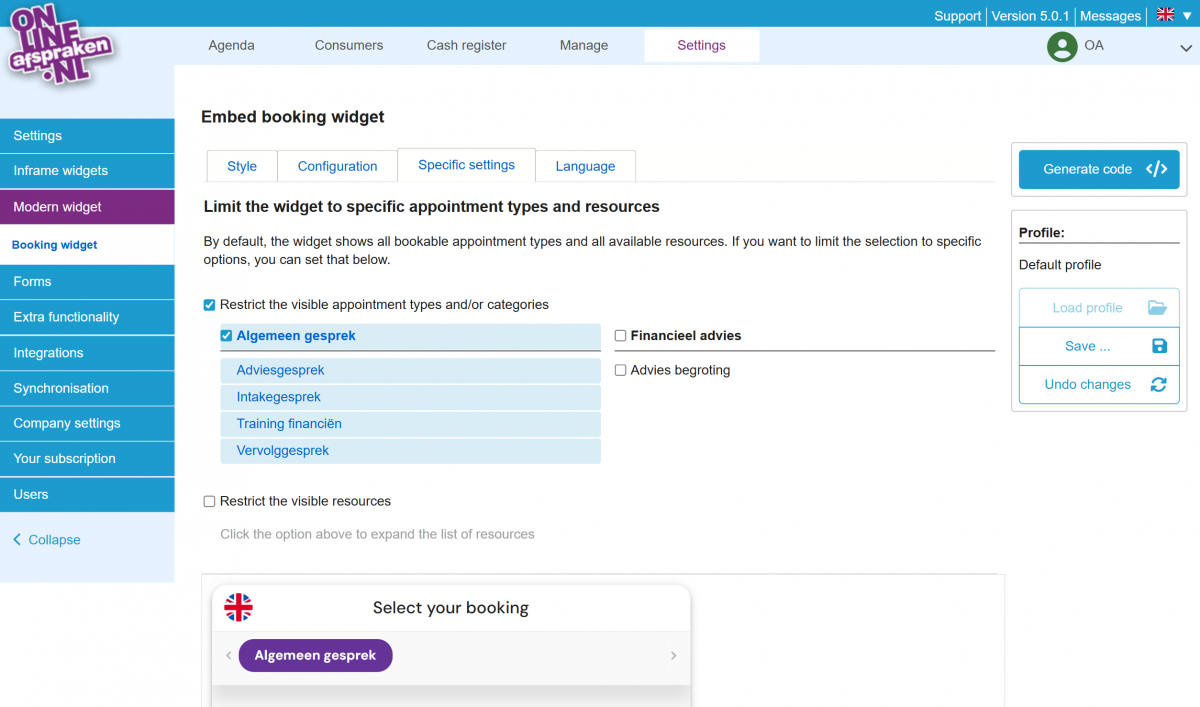
On the Specific settings tab, you can choose which appointment types and/or resources should be visible in this particular widget. This allows you to create separate widgets per appointment type or resource, just like with the original widgets.
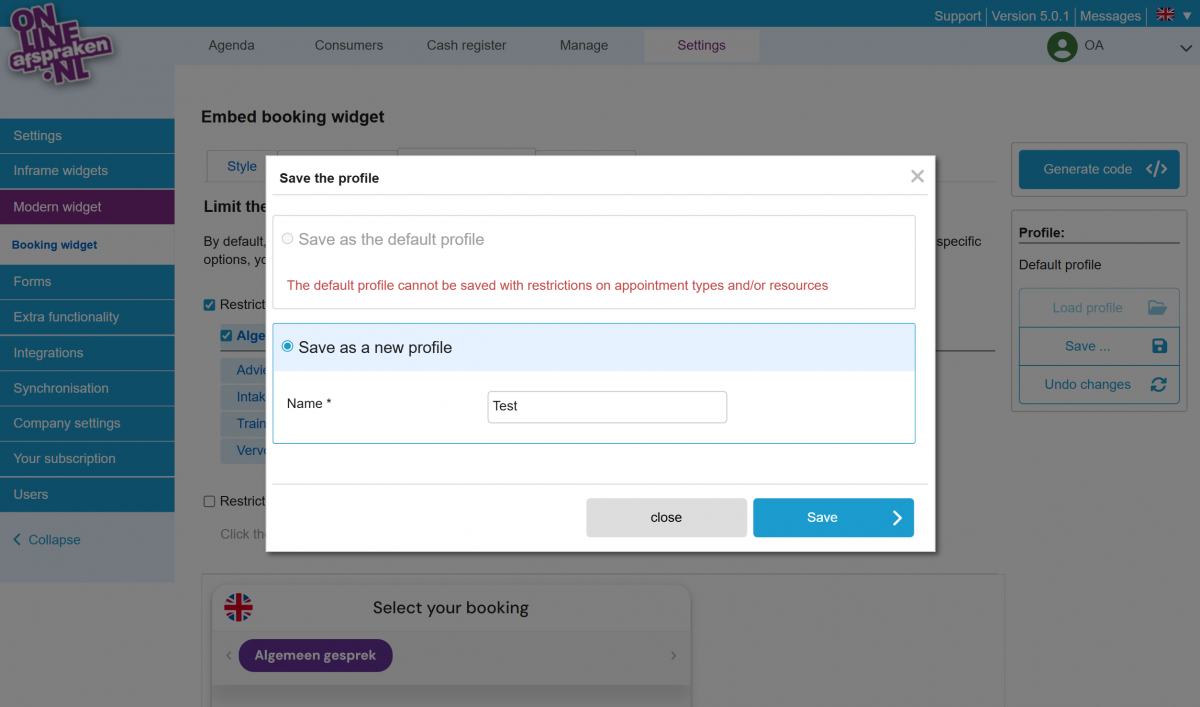
Note: When creating a widget with specific settings, we always recommend saving it as a separate profile. You can do this on the right-hand side by selecting “Save as new profile.”
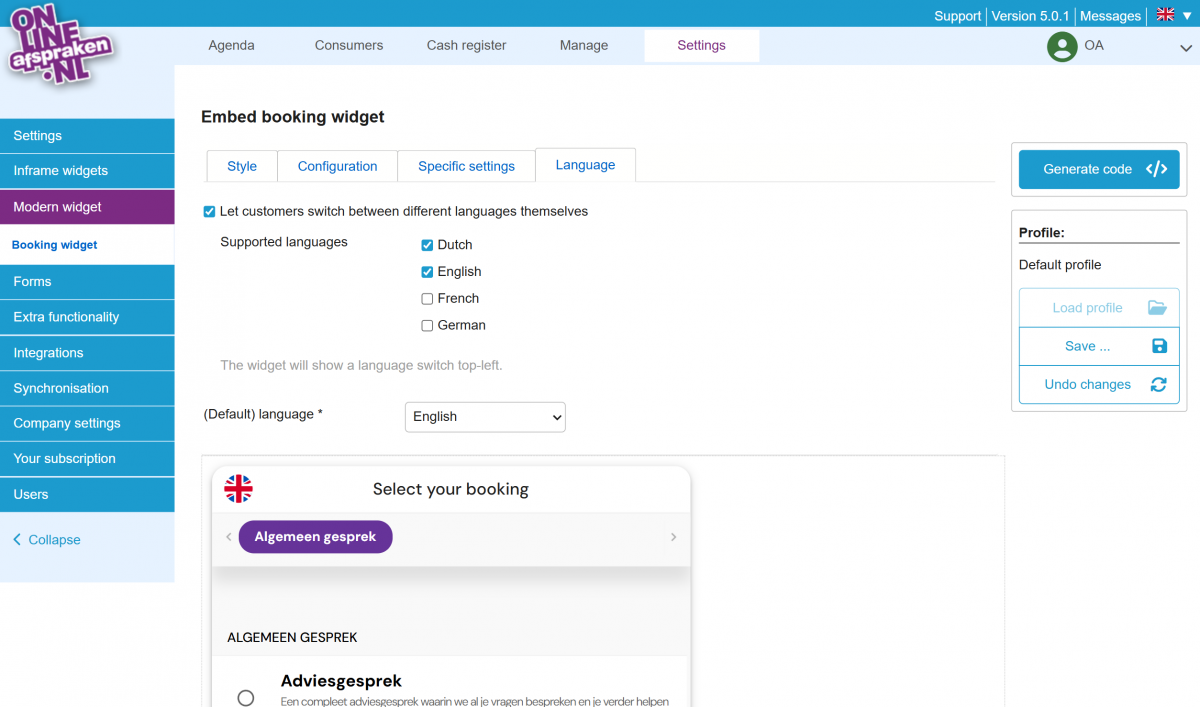
On the fourth and final tab, Language, you can set the default language of the widget and choose whether customers can change the language themselves. If you enable this option, you can also select which languages can be switched to. The available languages are Dutch, English, German, and French. The language switch will appear in the top left corner of the widget as a round icon. When customers click this icon, they can change the language.
Note: Only the widget interface and booking process will change language. The names of your appointment types and other custom content will not be translated automatically. If you want these to appear in different languages, create separate appointment types for each language and set up dedicated widgets per language containing only the relevant appointment types.
Generating code and embedding widget
There are several ways to generate the widget. Below, we explain the differences between the available methods so you can decide which one works best for you. First, click the blue “Generate code” button on the right. You’ll then see three options:
1: Standard method – With this method, the widget is directly embedded into your website. Within this method, there are three sub-options for how to embed it. You can choose to have it centered on your page or directly opened in a specific location on your site.
Note: With this method, a centered button will appear on mobile devices at the location where the widget is embedded, allowing customers to open the widget in full screen. On desktop/laptop, the widget will appear directly on the page.
You can also choose to embed a button on the left or right side of your website pages. On both desktop/laptop and mobile, this button will remain visible on the chosen side of the screen.
2: Link to widget – This method allows you to generate a direct link to the widget. It’s especially useful if you want to include the widget as a link in a newsletter or share it on social media.
3: Alternative iframe – This method is helpful if you want to place the widget within a specific frame on your website — for example, if your website is fully modular and you want to define a specific width and height.
Click the buttons below to see examples of the widget embedded using a left or right floating button on your website!